
The complete guide
Drain Hose Extension Buyer's Guide, How to Add Reach Without Causing Leaks
The problem, in one sentence
Appliance hoses are always the wrong length for the room you actually have.
Washing machines and dishwashers ship with a drain hose cut to a standard length, usually about a metre and a half. That works fine when the waste outlet sits directly behind the machine. It stops working the moment you move the appliance across the laundry, tuck a dishwasher into a different cabinet, convert a cupboard into a utility space, or move into a rental where the plumbing was clearly planned by somebody who never did laundry.
The usual reaction is to drag the machine as close to the outlet as the hose allows and live with the result. That leaves you with a machine jammed into a corner, a door that will not open fully, and a hose stretched tight. A stretched hose is a hose that pops off a joint eventually, and a popped joint during a drain cycle puts twenty litres of grey water on your floor.
A one metre extension kit fixes the geometry problem for the cost of a takeaway coffee or two.
What this kit actually does
There are three jobs in extending a drain hose, and a decent kit handles all three.
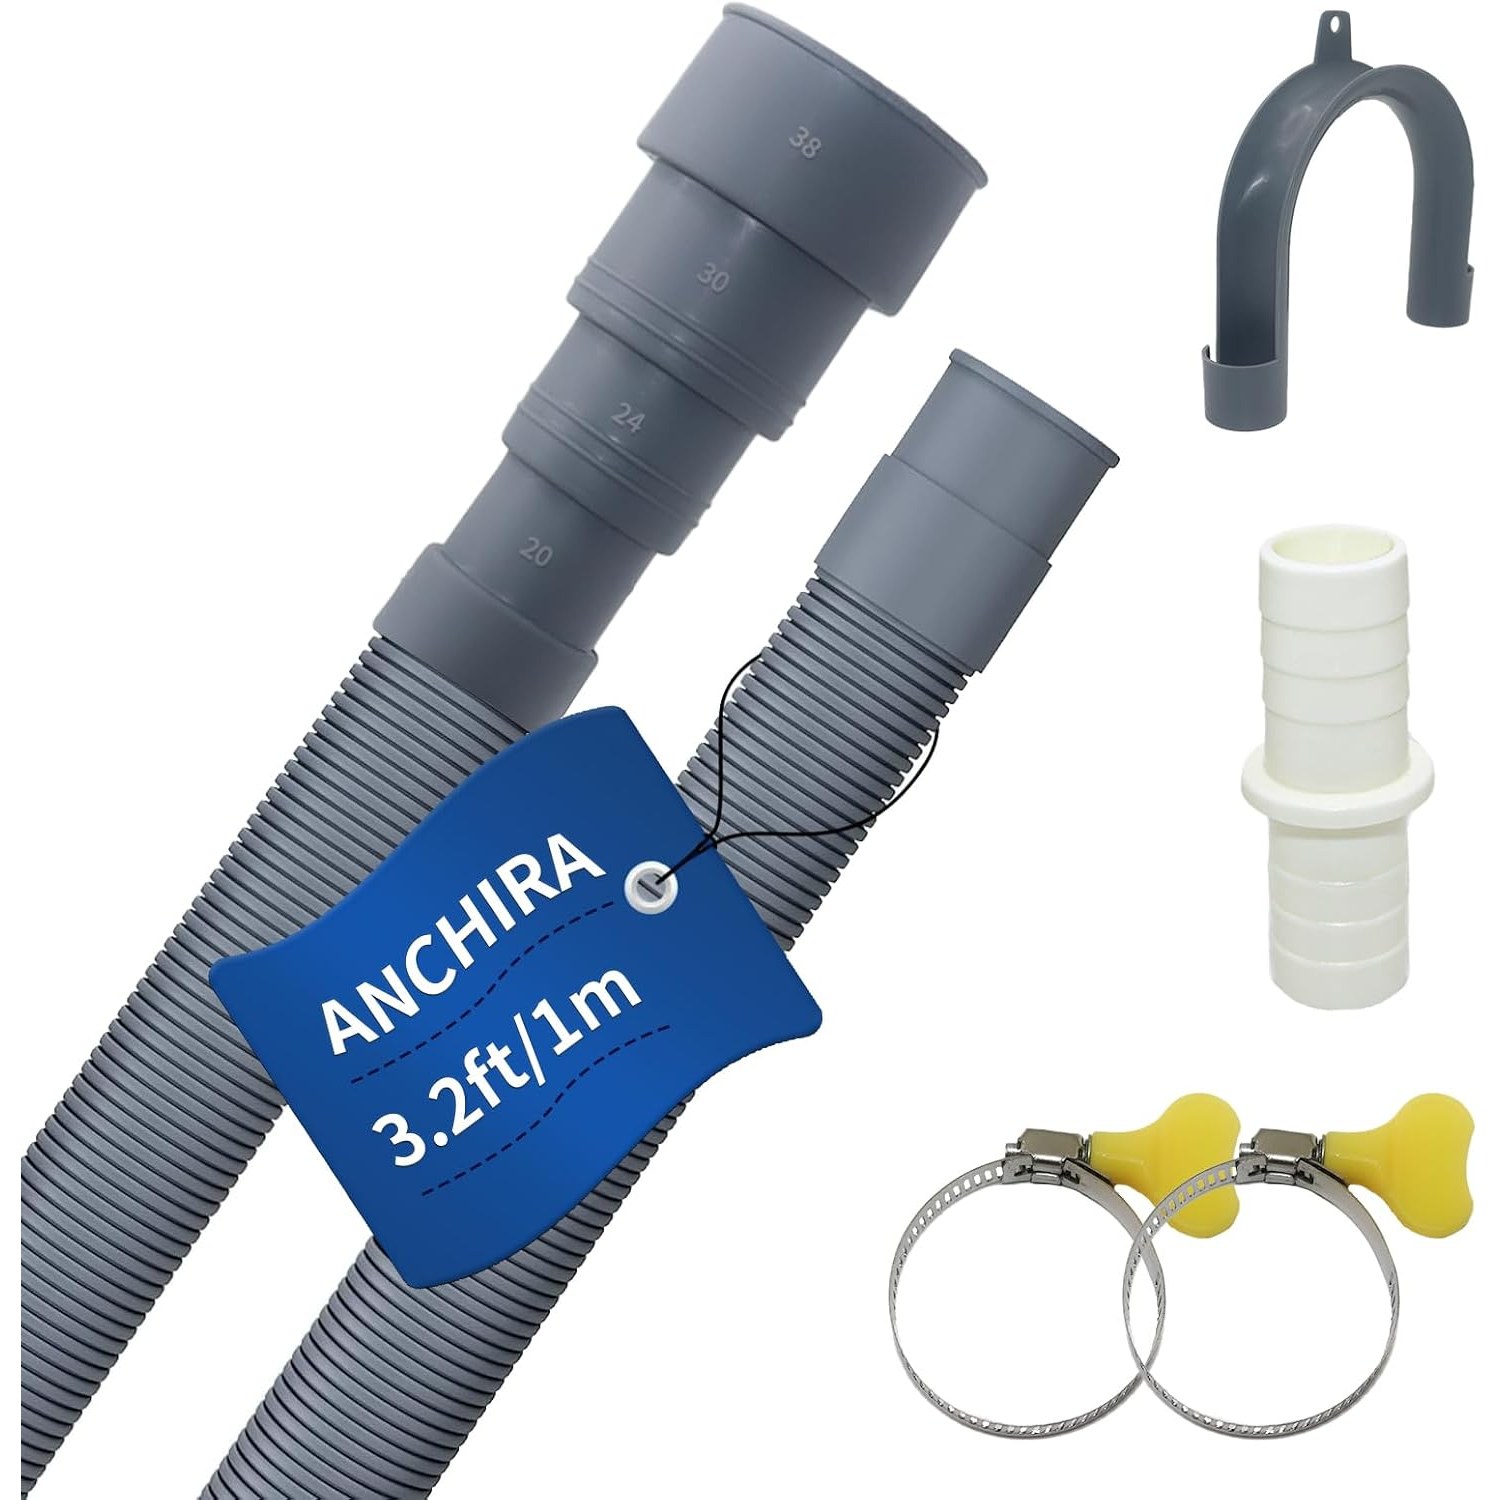
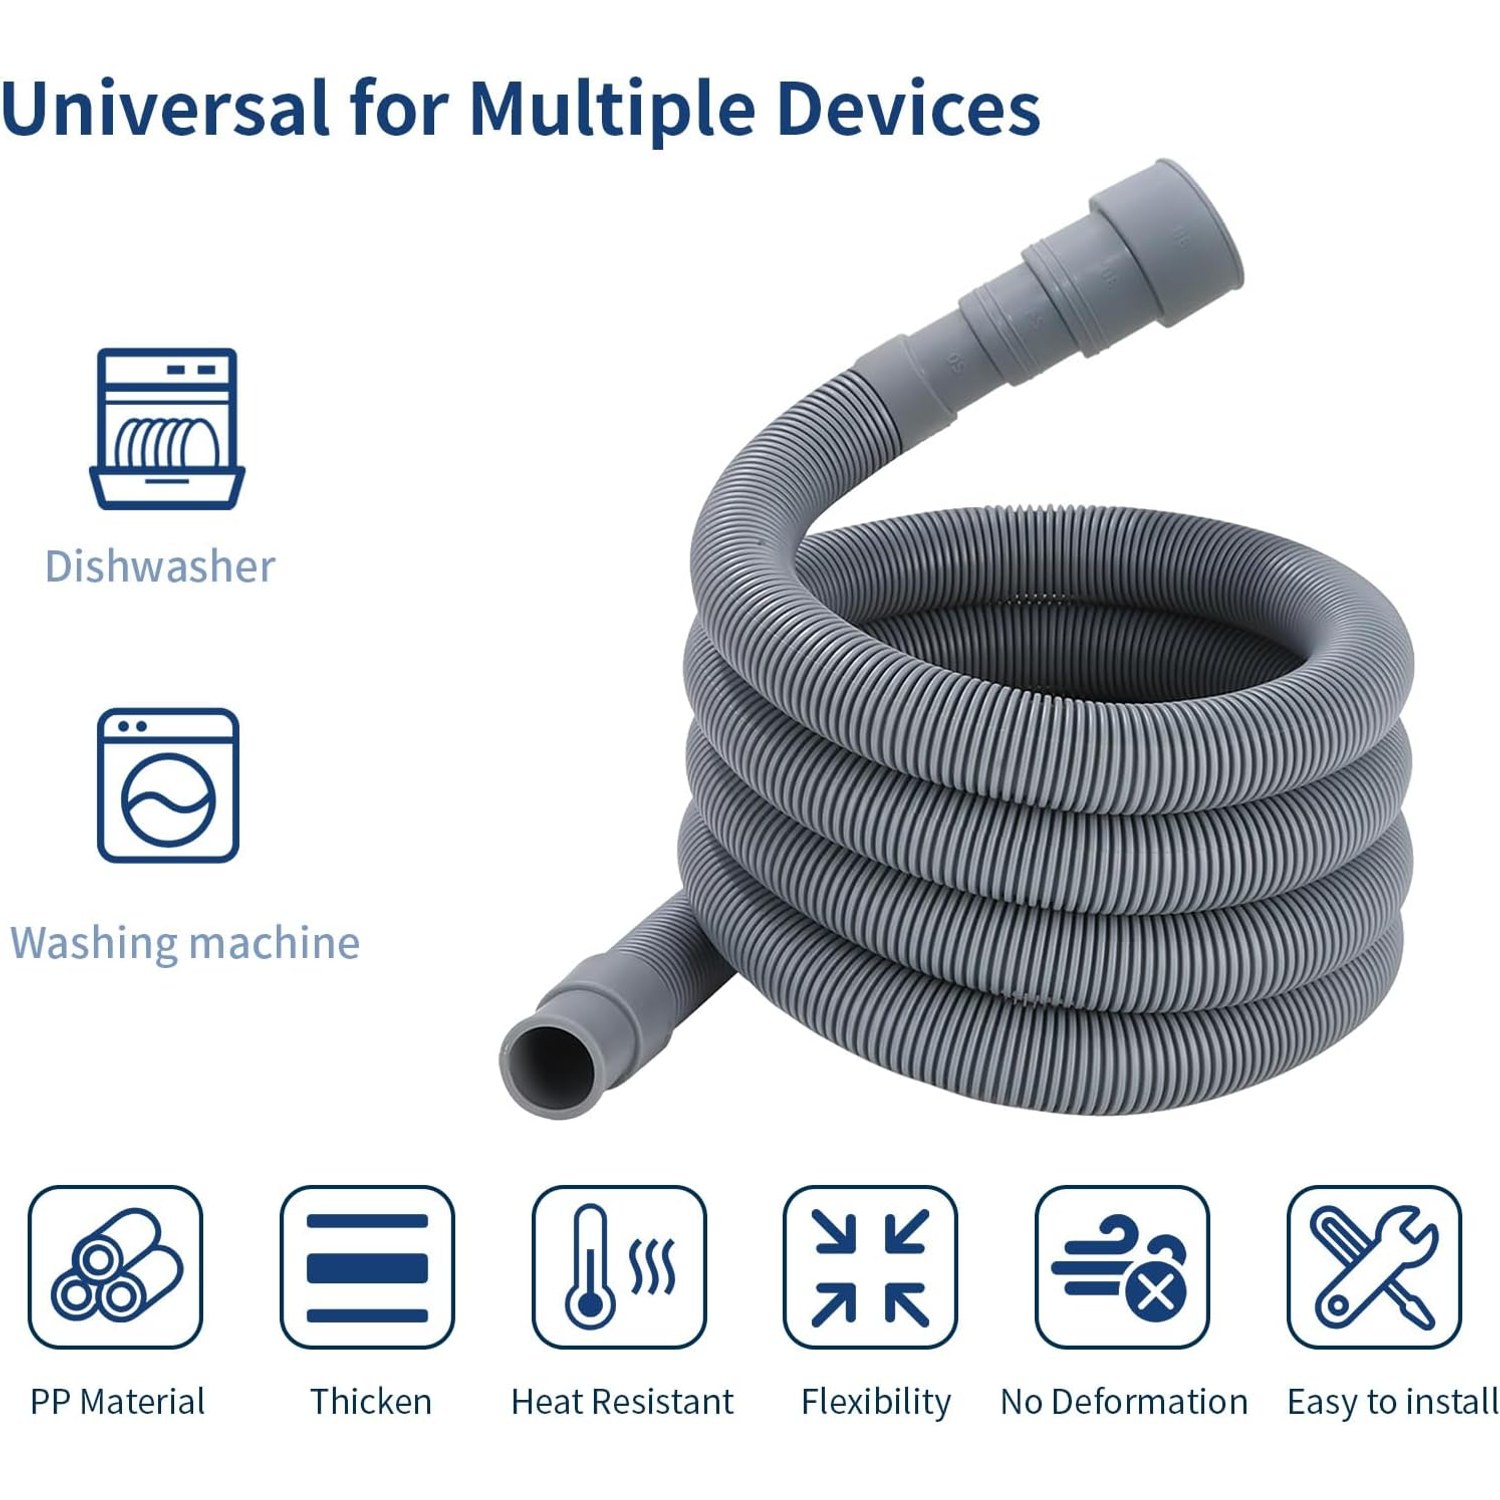
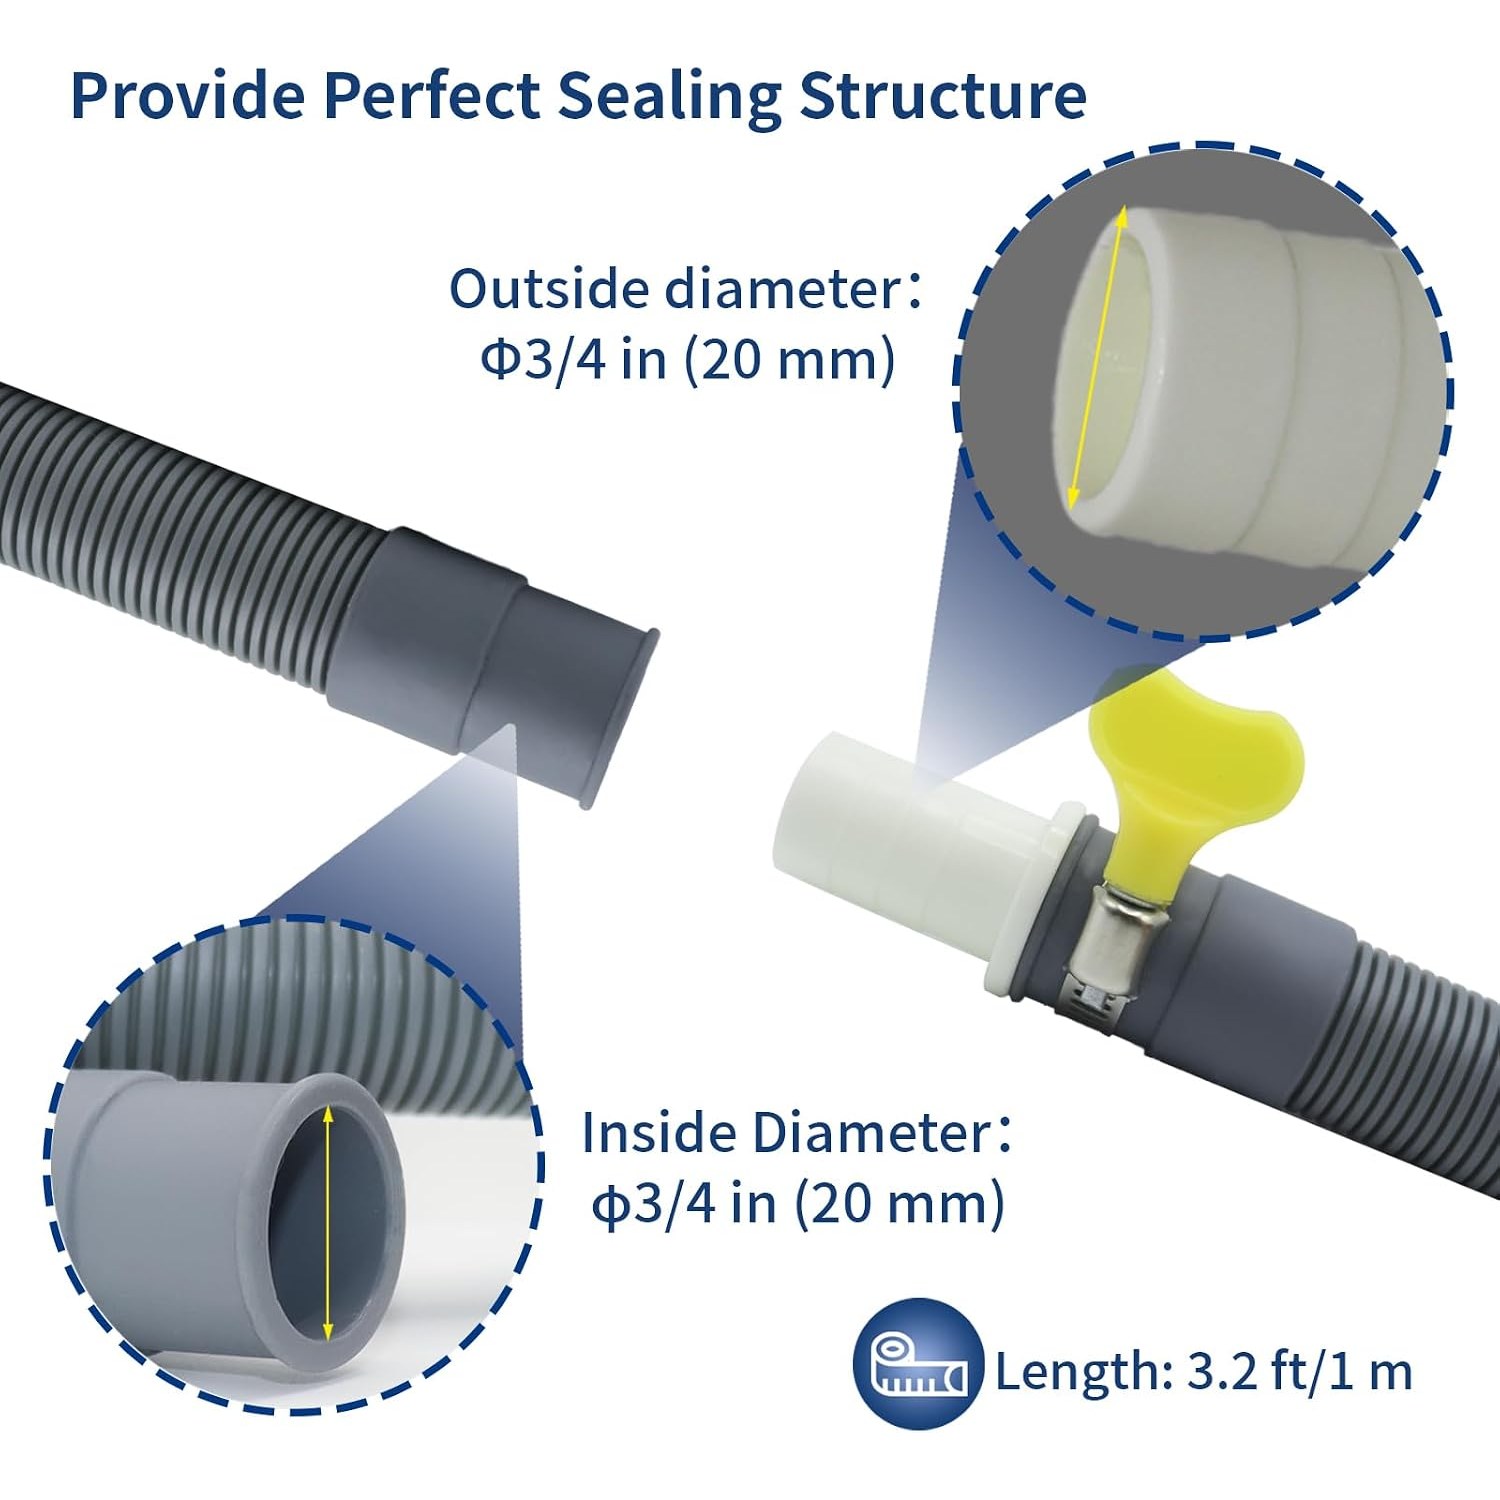
The first is the hose itself. This one is polypropylene with a corrugated, ribbed wall listed at 3 mm nominal thickness and a 20 mm outside diameter. Corrugation is the key detail. A ribbed wall bends around a tight corner by letting the ridges on the outside of the curve open up and the ones on the inside close together, so the bore stays open. Push a smooth-wall hose around the same corner and it folds flat. A flat hose is a blocked hose, and a blocked hose gives you a drain error code and a half-full drum.
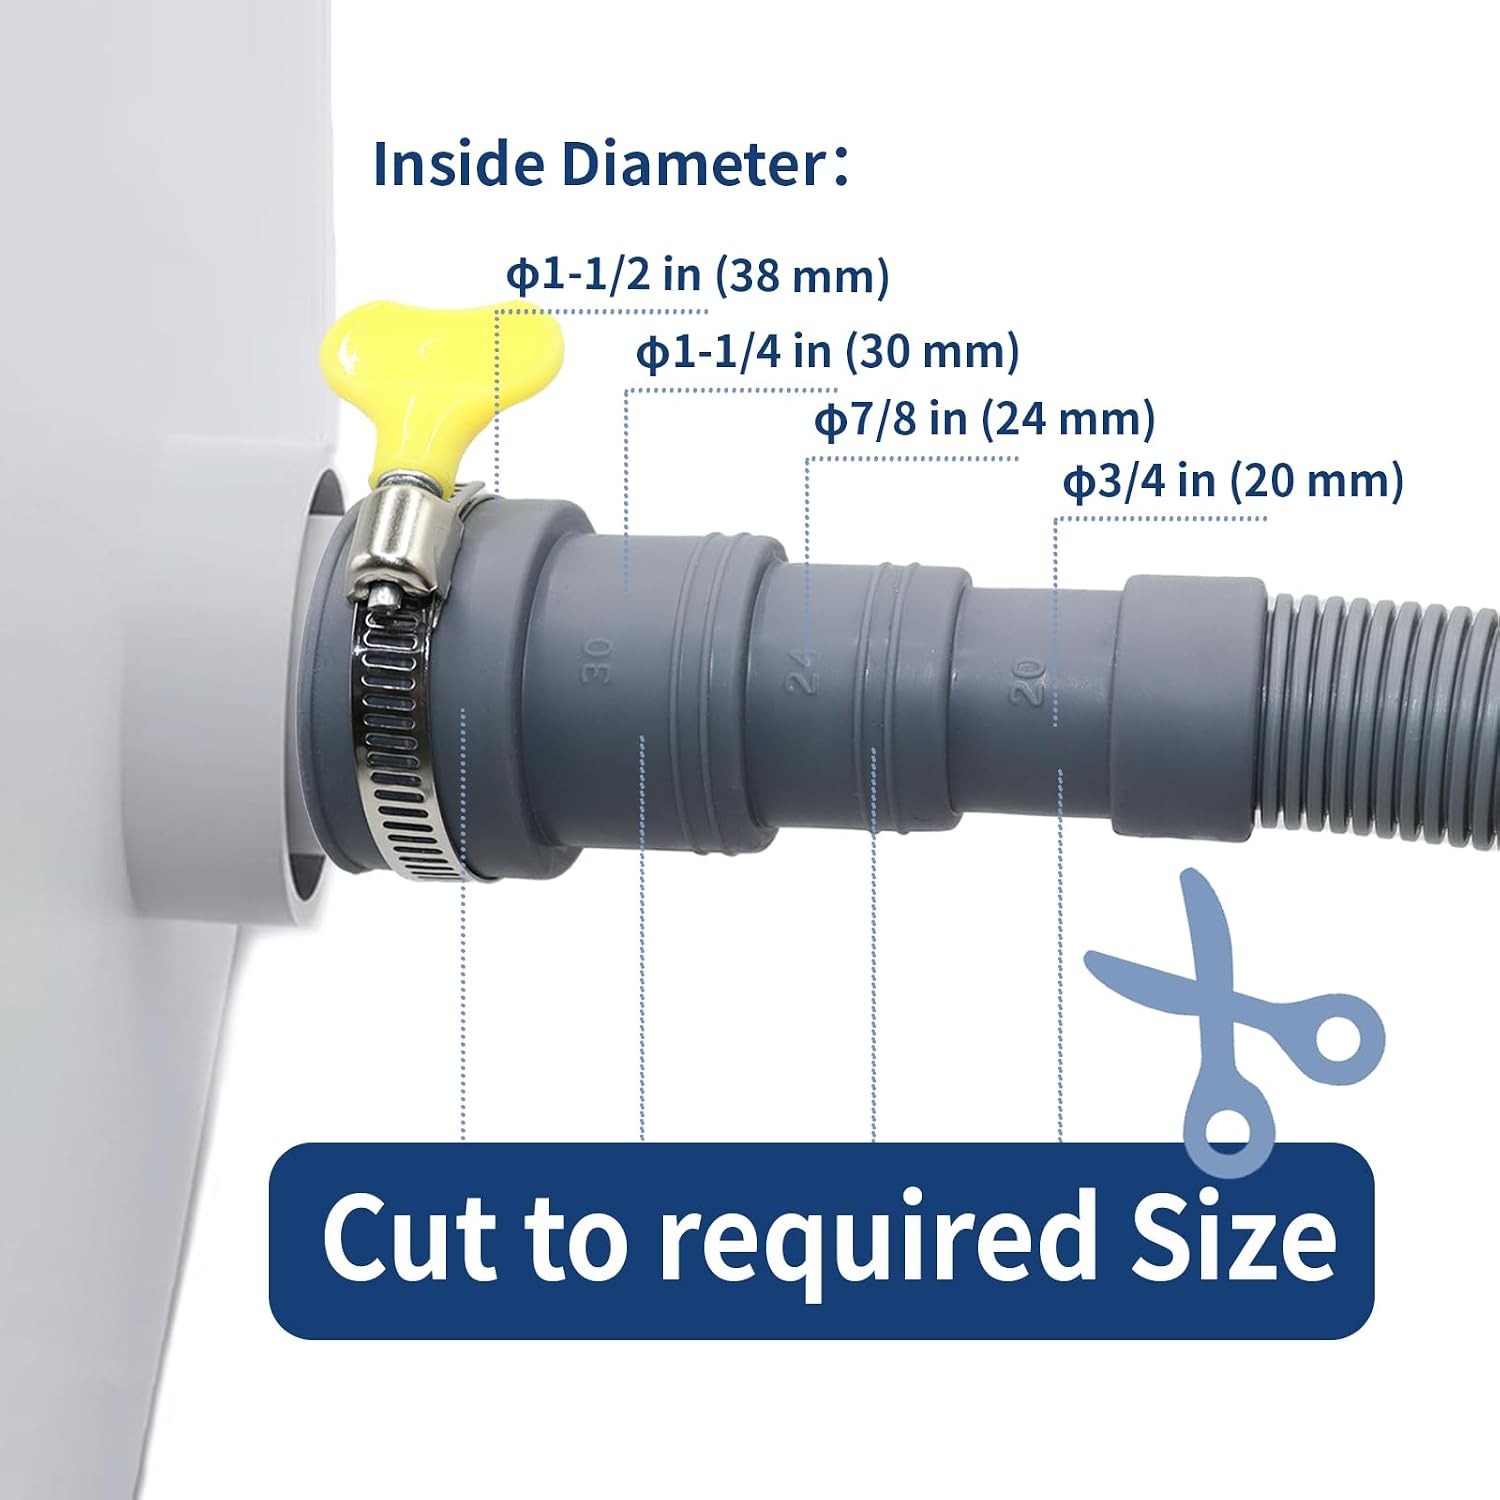
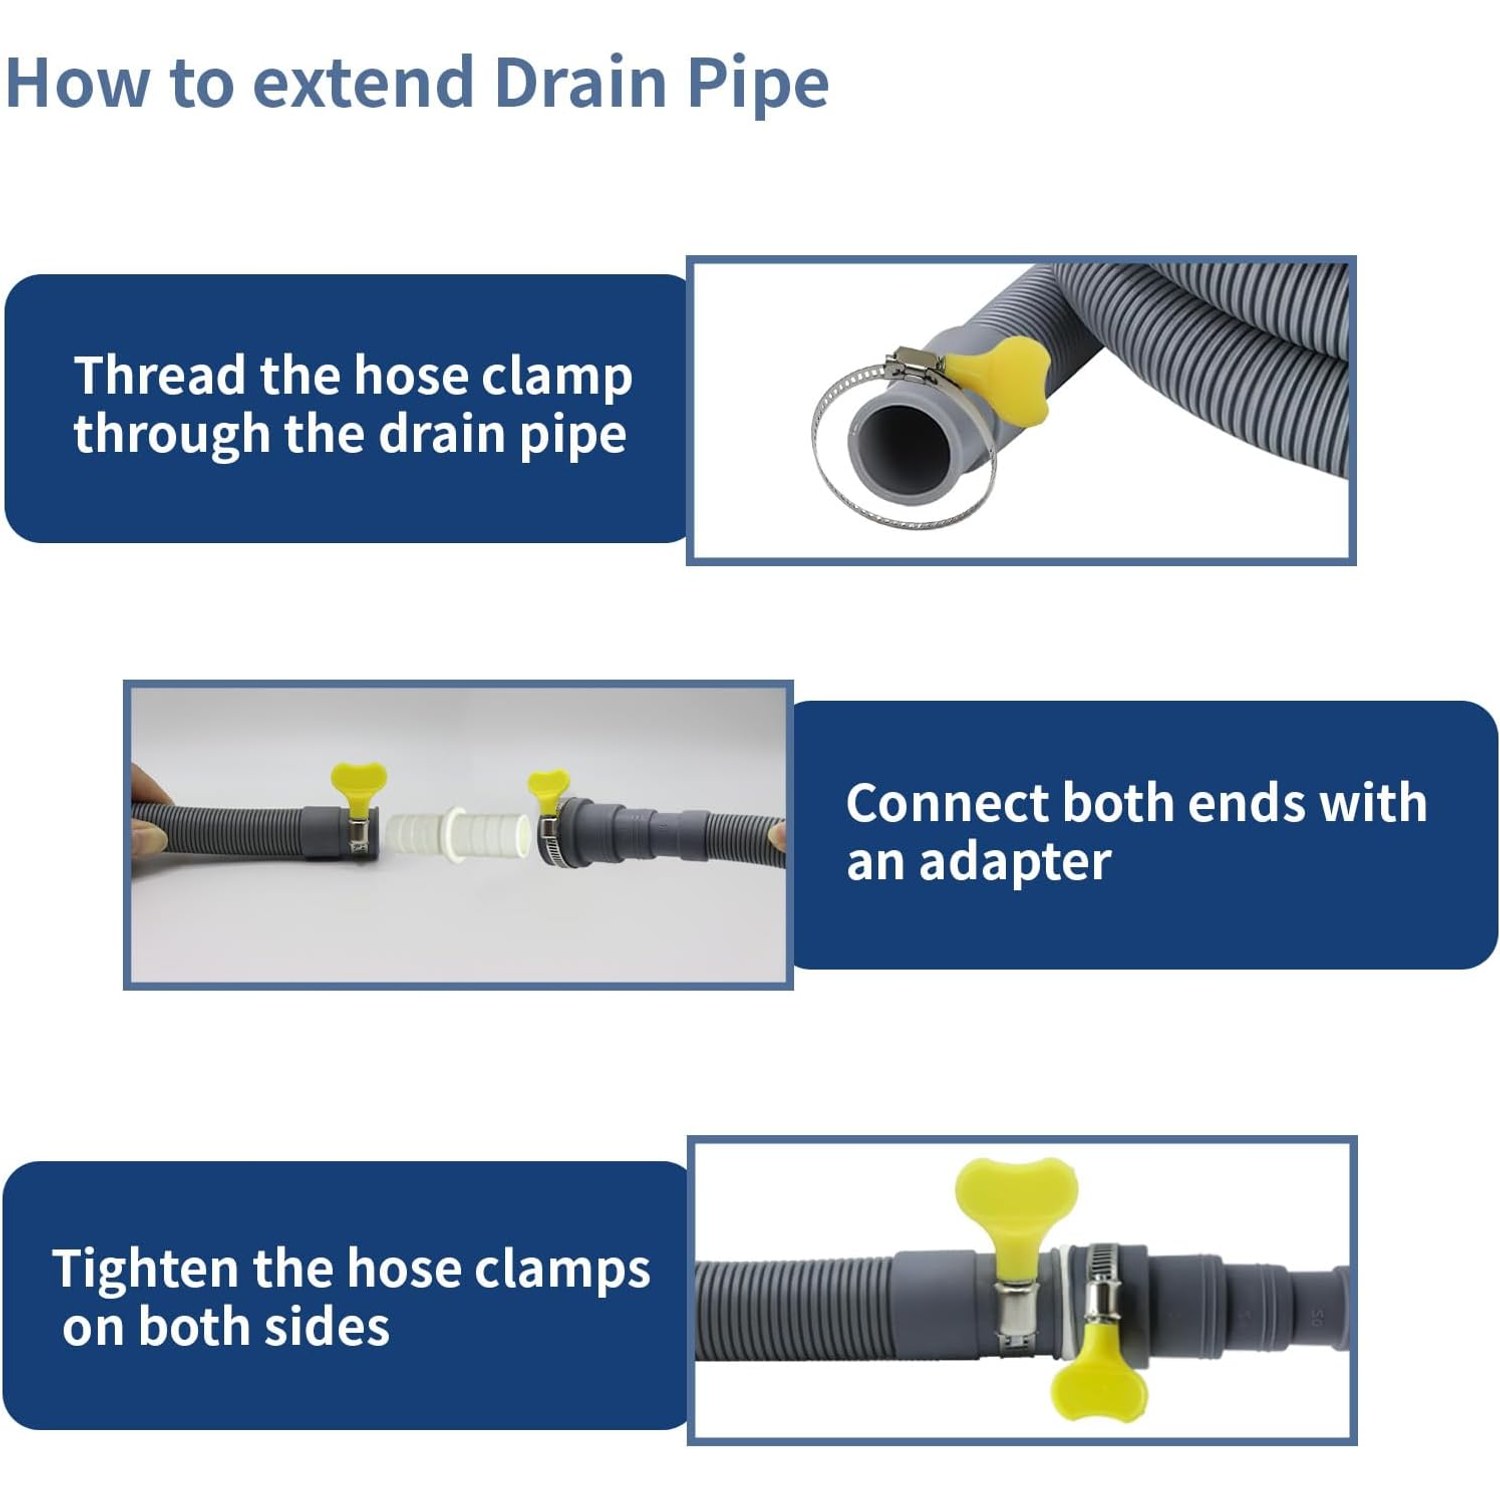
The second job is the join. Two hose ends do not connect to each other, so you need a connector. This kit uses a stepped barbed connector, which is the sensible design. The steps mean one part fits several internal diameters. You cut the connector back at whichever step matches your existing hose, push both hoses on, and you have a join that is a close mechanical fit rather than a hopeful push.
The third job is holding the end in place. That is the U-shaped bracket. It clips to the hose near the outlet and gives you a stable hook over a sink rim, laundry tub edge or standpipe. People skip this part and regret it, because a loose hose end will wander during a spin cycle and can end up sitting in standing water.
Two stainless steel clamps finish the job, sized for roughly 18 to 38 mm so they cover the usual appliance hose outer diameters.
Who this suits
If you are moving a washing machine more than about half a metre from where it currently sits, you need an extension. If you are fitting a dishwasher into a kitchen run where the waste connection is two cabinets away, same answer. Renters who inherit awkward plumbing are probably the biggest group here, because they cannot move the outlet and have to work with what is on the wall.
It also suits anyone whose original hose has split near the outlet end. Rather than replacing the whole hose, you can trim back past the damage and splice on a fresh metre with the connector and clamps.
Where it does not suit you is any situation that calls for rigid pipe. If the run needs to go inside a wall, under a floor or anywhere you cannot reach to inspect it, that is a job for proper waste pipe and ideally a plumber. Flexible hose should always be accessible.
How to choose, and what to check first
Start with a tape measure. Measure the outer diameter of the drain hose currently on your machine. Around 20 mm is the common domestic size and is what this kit is built for. If yours is notably fatter or thinner, check the connector steps before you order.
Next, measure the distance from the machine's hose outlet to the point where the water needs to end up, then add a little slack for routing. A hose pulled taut is a hose under stress. One metre covers most practical repositioning, but if you need more, think carefully.
That brings up the limit nobody mentions. Drain pumps are sized for a specific maximum total hose length and a specific maximum height. Your appliance manual will state both, often something like three to four metres of total hose and a drain height between about 60 and 100 cm. Go past either figure and the pump struggles, cycles get longer, and you may see drain faults. Check your manual rather than guessing.
Finally, think about the route. The ideal run is short, has one gentle rise, and no tight bends. Every extra turn costs a little flow.
Fitting it without drama
Unplug the appliance and shut the water off. Pull the machine out far enough to work behind it comfortably.
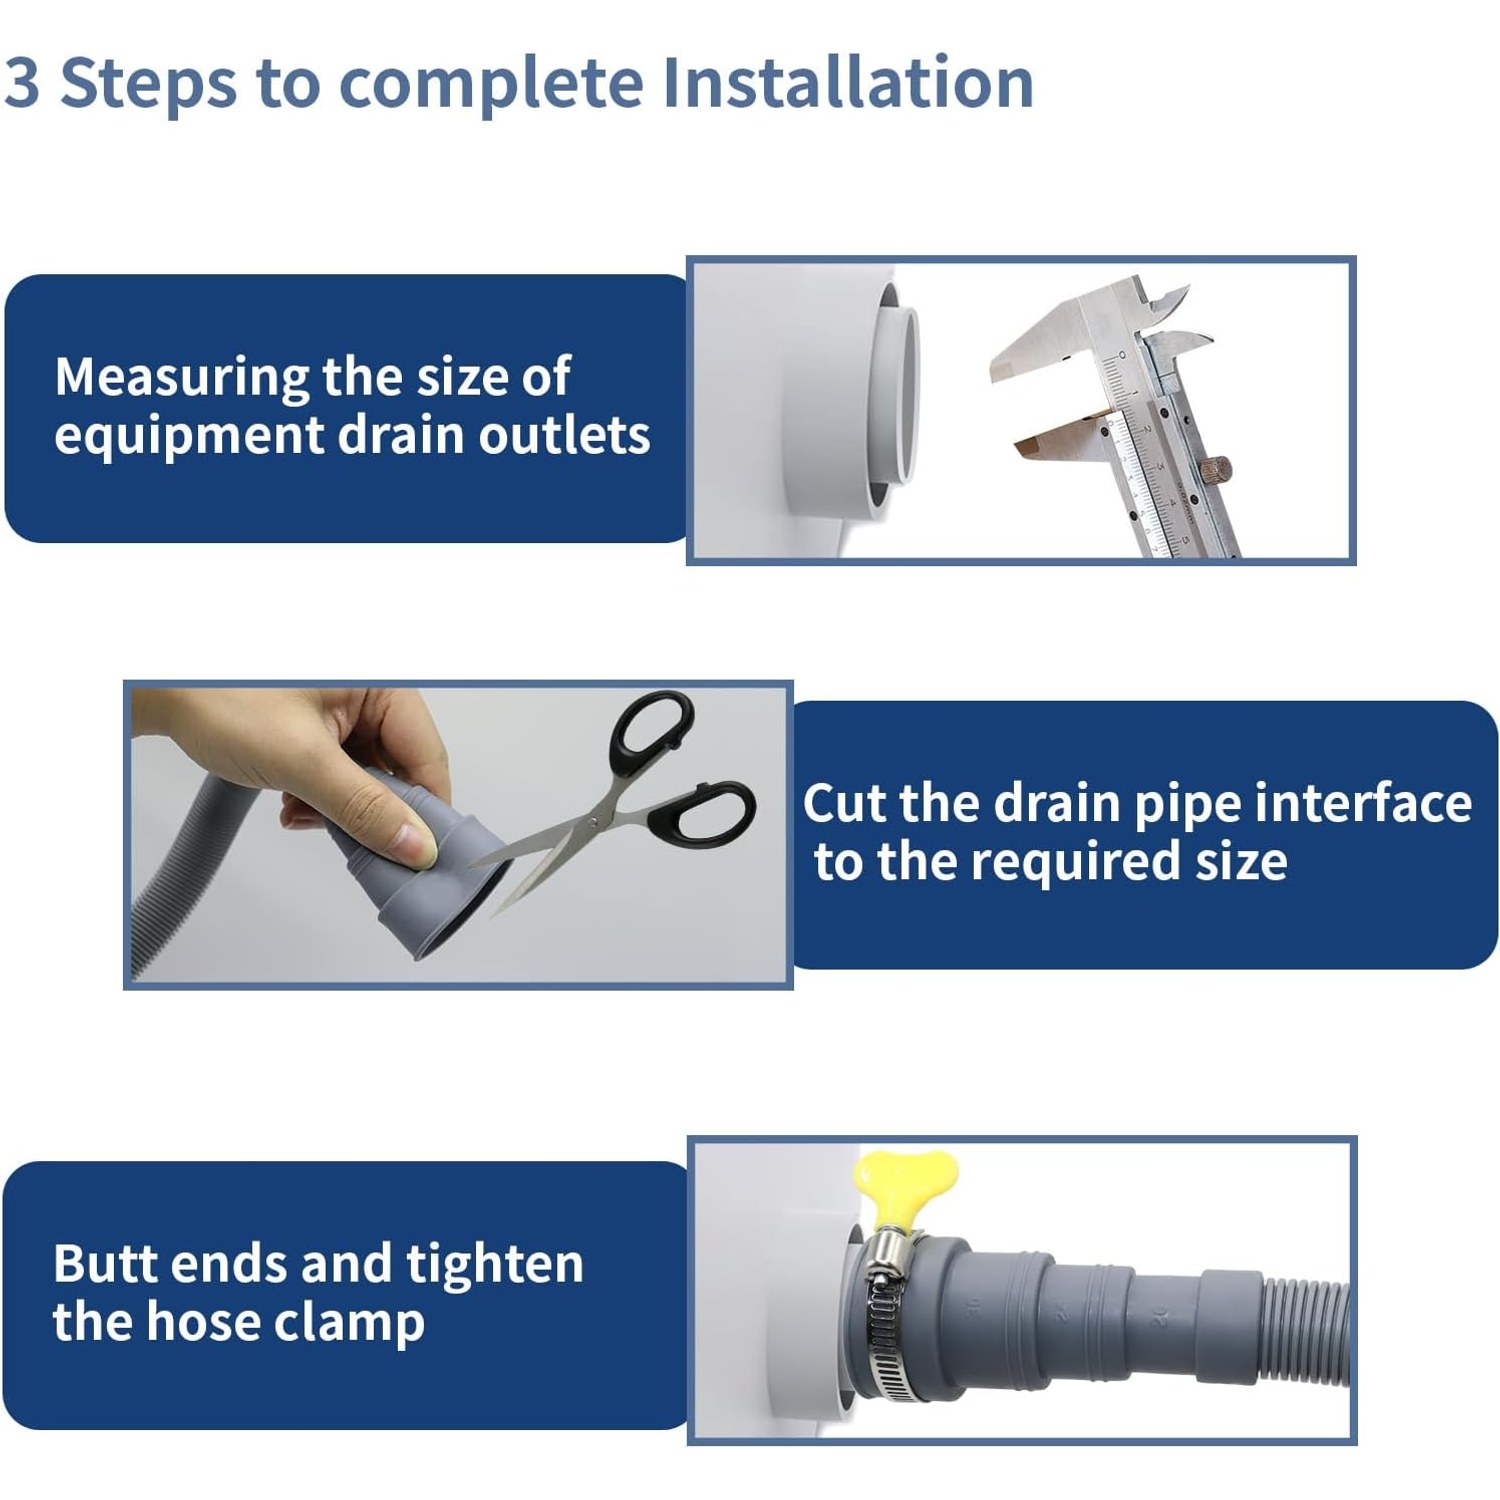
Look at the end of your existing hose and note its inner diameter. Trim the stepped connector at the matching step with a sharp knife or small saw, and clean up the cut edge so there are no burrs. Slide a clamp onto each hose before you push them onto the connector, because threading a clamp on afterwards is fiddly and you will say words you regret.
Push each hose fully onto its barb. Position the clamps over the barbed section, not over bare hose, and tighten them with a screwdriver until firm. Firm, not crushed. Over-tightening a clamp onto corrugated hose can cut into the wall.
Clip the U-bracket near the outlet end and hook it over your sink edge or into the standpipe at the height your manual asks for. Make sure the end is not sitting in water, because a submerged outlet can siphon dirty water back into the drum.
Push the machine back, leaving a loose loop of hose rather than a pinched bend. Run a short rinse cycle and watch both joints with a dry tissue. Dry tissue after a full drain means you are done.
Care, and the warning signs
Appliance waste hoses lead a dull life and then fail suddenly, so a little attention pays off.
Check the clamps every few months and any time you move the machine, since vibration slowly loosens things. Give the hose a quick look for flattened sections that no longer spring back, cracks at the bends, or any crusting at a joint. Those are all replace-it signals.
If the hose starts to smell, disconnect it and flush it through with warm water and a little detergent, then hang it to drain and dry before refitting. Lint and detergent residue build up inside over time and that is usually where odours start.
Keep it away from heat sources and avoid storing anything heavy on top of it. Polypropylene handles normal warm waste water fine, but it is still plastic.
The short version
A one metre extension kit buys you flexibility, and that is nearly always the thing standing between a working laundry and an awkward one. You get corrugated polypropylene hose that bends without closing, a stepped connector that fits a range of hose sizes, two stainless clamps so the joints hold, and a bracket so the outlet end stays where you put it.
Measure your existing hose first, check your appliance manual for maximum drain length and height, then fit it in about ten minutes with a screwdriver. Leave slack behind the machine, never let the outlet sit in water, and check the clamps once after the first wash.
Do that and you will forget the hose exists, which is exactly what you want from one.